(Above: Photo credit: Extrude Hone Corporation)
For more information or sample processing of parts contact: Dave Davidson | SME Tech Community advisor | dryfinish@gmail.com
This material edited and annotated by DESC member LaRoux Gillespie, CMfgE, PE will be of interest to anyone interested in the importance of deburring and surface conditioning to critical component functionality. Much of the discussion here centers around the risk involved in failing to adequately address edge finish and surface conditioning issues in aeronautical and aerospace manufacturing. The forum discussion was brought to the attention of the DESC group by Giovanni Cirani, an SME-DESC Technical Group member and CBF specialist from Italy.
Abstract
The following paragraphs provide some insight into the issues caused by burrs and sharp edges, and surface roughness. This is the result of combining proven research with discussion and industrial experiences, particularly on aircraft parts.
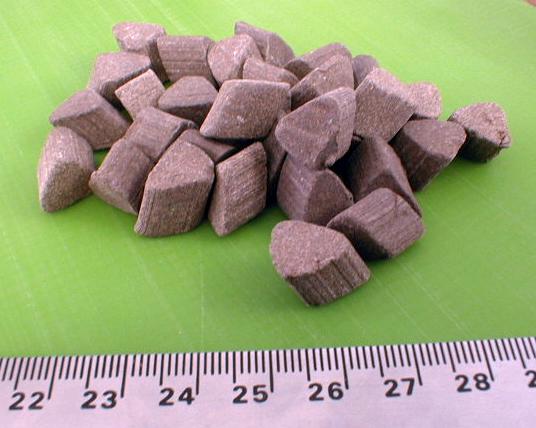
- Abrasive mass finishing media (such as these 3/8 inch ceramic angle cut triangles) are used for “roughing” or cutting in mass finishing machine finishing operations. Equipment used includes barrel, vibratory, centrifugal barrel, centrifugal disc and spindle finishing equipment.
The book Hand Deburring: Increasing Shop Productivity (Gillespie, 2003) and Deburring and Edge Finishing Handbook (Gillespie, 1999) note that burrs and sharp edges create many problems. Understanding a customer’s specific concerns and terminology allows the manufacturing plant to adopt different approaches to edge finishing. Sharp edges on finished parts can result from neglecting a sharp edge or by producing a burr with many sharp facets. Burrs and sharp edges are problematic and raise many issues. Burrs on sheet metal parts cause premature tearing during formation. Plating over burrs and sharp edges allows early corrosion attack or a poor fit in assembly. Fine burrs on automotive cylinders (grinding micro-slivers) can cause engine failure. Burrs on life safety devices can provide unrealistic levels of perceived safety. Automotive mechanics regularly sustain cuts and bruises from burred and sharp edged components. Edge quality issues include performance, safety, cost, and appearance, as detailed in the following list of 25 issues:
• cut hands in assembly or disassembly
• interference fits (from burrs) in assemblies
•jammed mechanisms (from burrs)
• scratched or scored mating surfaces (which allow seals to leak)
• friction increases or changes (disallowed in some assemblies)
• increased wear on moving or stressed parts
• electrical short circuits (from loose burrs)
• cut wires from sharp edges and sharp burrs
·• unacceptable high voltage breakdown of dielectric
·• irregular electrical and magnetic fields (from burrs)
• detuning of microwave systems (from burrs)
• metal contamination in unique aerospace assemblies
• clogged filters and ports (from loose burr accumulation)
• cut rubber seals and O-Rings
• excessive stress concentrations
• plating build up at edges
• paint buildup at edges (from electrostatic spray over burrs)
• paint thinout over sharp edges (from liquid paints)
• edge craters, fractures, or crumbling (from initially irregular edges)
• turbulence and nonlaminar flow
• reduced sheet metal formability
• inaccurate dimensional measurements
• microwave heating at edges
• reduced fatigue limits
• reduced volumetric efficiency of air compressors
• reduced cleaning ability in clean room applications
• reduced photoresist adherence at edges, and to the list we would add:
• less aesthetic appeal. —
The sources describing the research on effects of burrs are listed in Deburring: A 70-Year Bibliography (Gillespie, 2001).
An increasingly popular method for deburring and finishing precision machined components is centrifugal isotropic finishing. Click on the video above to see a case study from a precision contract machining facility. (Dave Davidson | SME Tech Community Network | dryfinish@gmail.com
Discussion
In October 2002 Will K. Taylor in an Internet open forum stated, “It is standard aeronautical practice to: (a) attain 125-microinches Ra machined finish [or better] on cut and machined edges/surfaces; (2) deburr holes and chamfer/radius edges; and (3) round-off [radius] sharp [square-ish] exterior and interior corners.” He then asked, “What engineering and practical benefits are derived from following standards and practices?”
The many responses to this question generally reflect the above bulleted issues – some in more depth and a few in questioning or less proven fashion. While the entire discussion is not recreated here, many of the ideas are. For complete details see http://www.eng-tips.com [aircraft engineering forum]. The editor of this paper does not authenticate the answers, but believes the commentary is useful for further research.
Fatigue life, stresses and strain
Fatigue life increases when decreasing surface roughness, and smoother surfaces have less preload loss when they are part of a mechanically fastened joint
Burrs increase stress concentration at hole edges, which already have three times the net section stress at the edge.Therefore, removing burrs decreases stress concentration, which increases fracture resistance and fatigue life.Lastly, burrs can interfere with proper seating of mechanical fasteners, so removing them reduces damage to fasteners and clamped components during assembly.
Sharp corners increase stress concentration, so increasing radii decreases stress concentration, which increases fracture resistance and fatigue life.
If water creeps under interfaces via higher surface roughness and fills up a cavity or interface, then freezes, it could create high stresses and/or accelerate material fracture, not to mention stress corrosion cracking at scores from the hidden, trapped water/chemicals.
One author notes, “Sharp corners, burr holes etc. increase not only the stress but the strain as well. Looking at the strain we can have three different situations:
1.The strain can be inside the linear behavior. (Under the yield limit)
2.The strain can be between the ultimate and the yield limit.
3.The strain can reach the ultimate limit
If the third situation is going to occur, the cracks can develop because the material failure. In this case, the crack can also reach the material’s “critical value”.
For this reasons, round the corners, deburr the holes, and finishing the surfaces will help to pass from the third to the first situation.”
Almost without exception fatigue cracks start at the surface of a part rather than internally. One possible reason may be that the highest stresses are usually found at the surface (e.g. bending and torsion) and the surface is vulnerable to stress raisers such as machining notches, scratches and pits. Surface finish affects the strength of a part subjected to fatigue loading because most machining operations leave a notch pattern and fatigue cracks usually originate in a notch.”
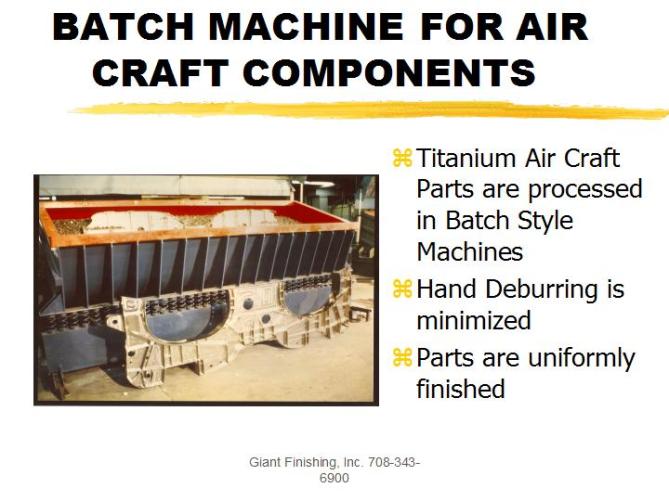
(Below: Mass Finishing methods can automate deburring procedures on many parts. The same processes can also be used to produce isotropic micro-finishes on parts to extend service life and improve functional performance. — Dave Davidson, dryfinish@gmail.com
Quench cracking
If the part is to be heat treated, leaving any sharp external corners can lead to quench cracking because of the much greater local cooling rate.”
Corrosion and coating impact
Poor surface finish introduces millions of new points for crevice corrosion on the surface.
Also, a rough surface can make it difficult to get good results with non-destructive testing methods like die penetrants–especially when the roughness is in a pattern (such as produced by fly cutting or milling).
Rougher surfaces or sharper exterior edges can scratch coated or painted surfaces during assembly and might allow hidden corrosion to spread underneath what might temporarily appear as good finishes.
The physics, electrochemistry, etc. are well documented about applying a coating to a sharp edge.When using any type of electrically catalyzed process (anodizing, electrocoating, electrostatic spray painting, etc.) current density fluctuations prevent the build-up of a uniform coating thickness.Variations in coating thickness have many negative aspects, such as variable friction at joint surfaces, areas for localized corrosion, pitting, galvanic cells, etc.Corrosion fatigue and stress corrosion cracking are obvious concerns.
Electrical issues
As noted above friction between rough surfaces will create electrical energy. That energy can create an accelerated galvanic-corrosion anode or cathode site, if all (most) other surfaces are coated or insulated. Burrs are sources of static discharge
Burrs and surface roughness will both interfere with good, uniform surface contact between faying surfaces in a mechanical joint.This increases the electrical resistance of the joint and, if severe, can cause problems with electrical bonding of structure; interfering with effective grounding of electrical equipment and/or antennae, and become a miniature plasma cutter in the event of a lightning strike.”
Current density due to sharp edges and burrs can cut through protective coatings on mating surfaces and radii providing a minute area of “clean metal” electrical path to drive corrosion dramatically worse than if no protective coating were there to begin with because of the extremely high resultant current density. The hole punching force of high current density results in stress risers to enhance SCC and corrosion fatigue.
For aircraft assemblies sharp edges become spark over points whenever voltage is applied (static, lightning strikes…)
Zero timing (Aerospace application)
One reader asks “If the fastener holes that are deburred are inspected with the use of HFEC (High Frequency Eddy Current) prior to installation into the aircraft, could those qualify as being zero timed? I was looking through an older Boeing Structural Repair Document (D6-81987) and there was a statement about increasing the inspection threshold of these fasteners (if the holes were zero timed) from 60,000 flight cycles to 100,000 flight cycles.That would be a significant reduction of cost for a maintenance shop.
Hydraulic and gas leaks
Higher values of surface roughness (and burrs) increase leakage rate under/around gaskets and seals.
Nipping gaskets, seals, and o-rings on sharp edges during installation, or scouring them on rougher surfaces during operation of rotating equipment, can accelerate leakage.
Sometimes a surface that is finished too well can hinder sealing.O-rings need something to hold on to – if your surface finish is too fine and the compression on the O-ring is too light- the O-ring is likely to fail.In one industry, engineers specify 63ra for most surfaces that will contact a secondary sealing element.(They do however require flatness and surface finish to an extreme on other parts – millionths of an inch for mechanical seal faces).
There are times when a sharp edge is needed. Labyrinth seals in gas turbines spring to mind, as do squealer tips on compressor blades.
Increased air drag
Increased air drag or turbulence can occur over rougher, dirtier surfaces.
Ice build up
Rougher surfaces can create a better adhesive surface to build up (and hold on to) such that more ice stays on the aircraft, overstressing the structure or adversely affecting operation.
Peening issues
Excessive surface roughness can be an indication of over-peening, which negates the beneficial aspects of compressive residual stress.Aluminum and magnesium are especially prone to over-peening, which results in many localized areas of increased stress.Problems with fracture (stress intensity) and fatigue (crack nucleation sites) are then possible/probable.
As others have already mentioned, joint problems can arise from excessive surface roughness, and over-peening is yet another method for creating surface roughness.
Shot peening, surface polishing, deburring and rounding off adds a sustained compressive stress into the material. This stress will counteract the tensile stress caused by a crack and help to contain its propagation.
Below are examples of a variety of parts that have been sample finished as a part of the SME MMR Tech Community Surface Finish research program. If you would like to send parts for sample processing and evaluation contact: Dave Davidson | SME Technical Community Network | dryfinish@gmail.com
References
Gillespie, L. K. 1999. Deburring and Edge Finishing handbook. Dearborn, MI: Society of Manufacturing Engineers (SME).
Gillespie, L.K. 2001. Deburring: a 70 year bibliography, Deburring Technology International, Kansas City, Missouri.
Gillespie, L. K. 2003. Hand deburring: increasing shop productivity. Dearborn, MI: Society of Manufacturing Engineers (SME).


PVD coating has been applied more & more – from cutting tools to human implants. Burrs and even micro-burrs are absolutely not desired – as a benefit of that very-thin coating (a couple of microns) can be lost once that burr is removed.
What is your experience with “edge & surface” prep specific to the PVD coating industry?
LikeLike
Lazy, Isotropic finishing for edge prep can increase lifee200-300 percent, probably more with additional coating
Dave Davidson
dryfinish@gmail.com
LikeLike